This page contains information about, and how I built my own High Temp Molten Salt Tank. This is a great item to have in any Bladesmith's shop, but it does not come without it's dangers! Any time you're dealing with a 1,000+ degree liquid, extreme care must be exercised. This page will help you to build your own, but because of the liabilty involved, I will not build High Temp Salt Tanks for anyone.
The "heart" of an automatic salt tank, is the controller, commonly called a "PID Controller" ( proportional-integral-derivative controller). After trying a number of different brands/types, I found one that is cost, effective, durable, and easy to operate.

This is the
Click on the image for a link to their website.

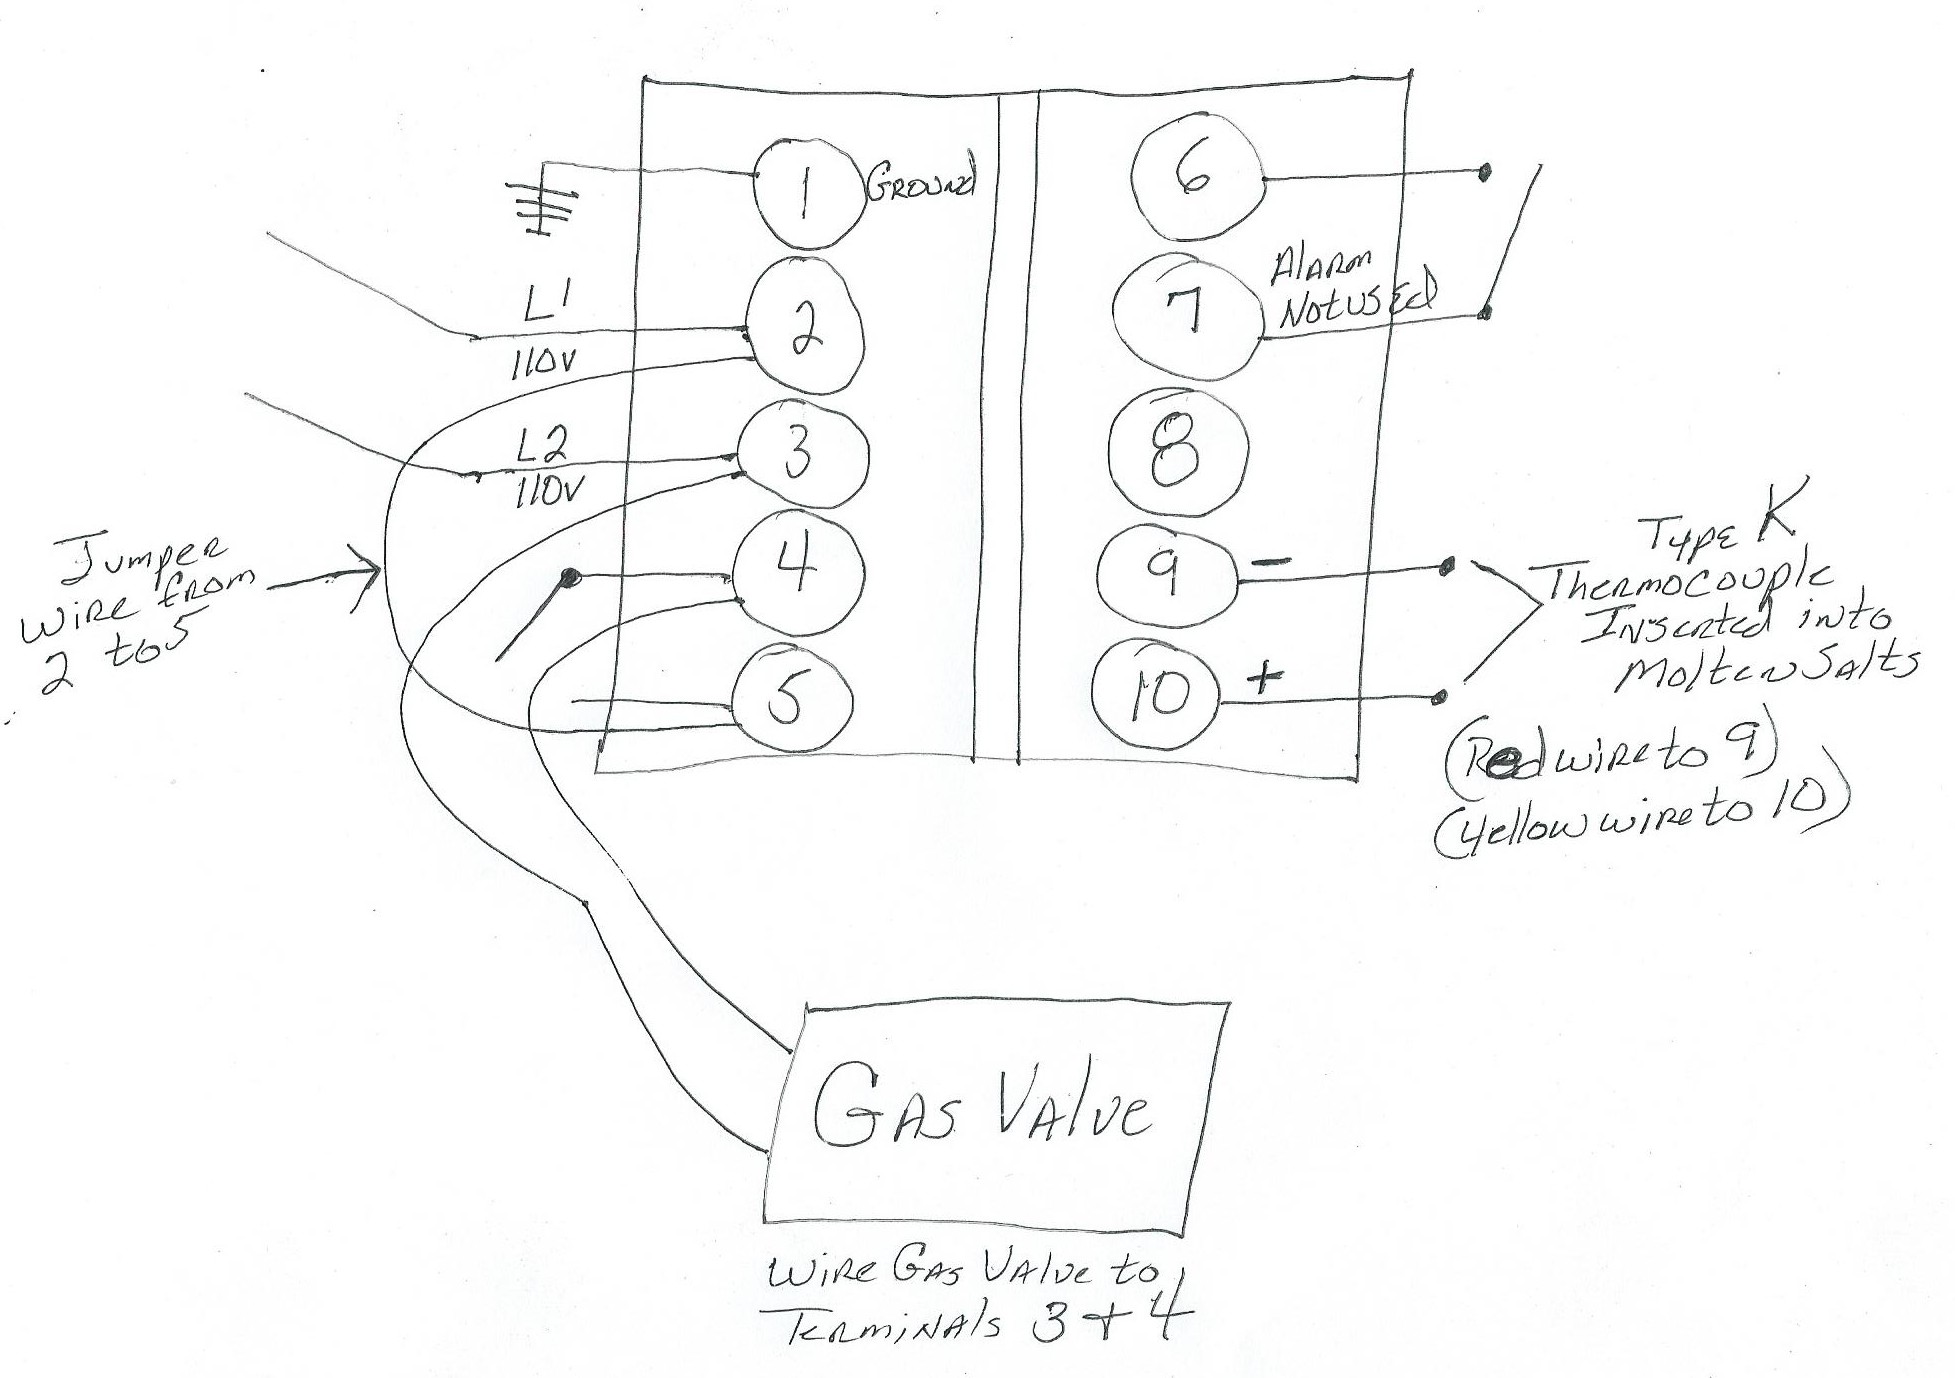
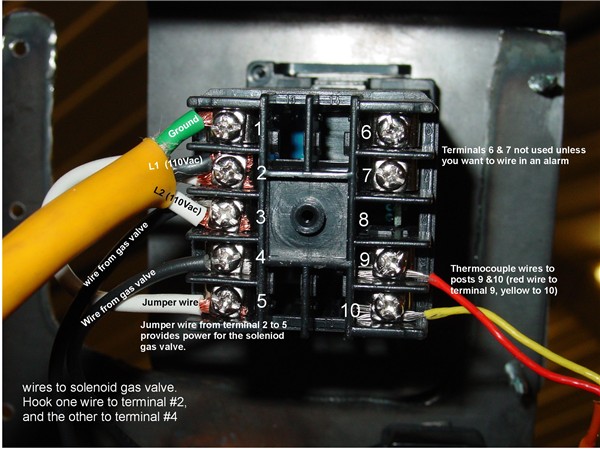
Following is a diagram of the back of the PID controller, with each of it's 10 terminals.
Later, I will show you a diagram of how I wired the controller to operate in a Salt Tank application, but for now, the rest of the parts. Next is a 110v, normally close, solenoid gas valve...for my salt tank I chose the Honeywell model V4046C 1047, 1/4", 10psi.
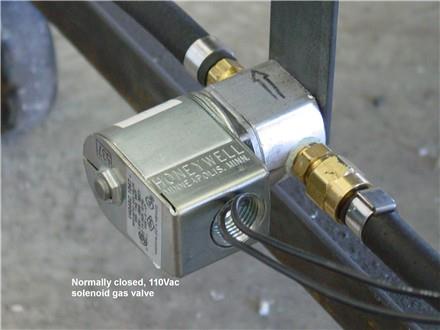
I would recommend checking local sources (I ordered mine through a local store called Northwest Pipe), if you can find it locally, look for it with a google search...take your time and look around, I've found that the prices vary widely from source to source.
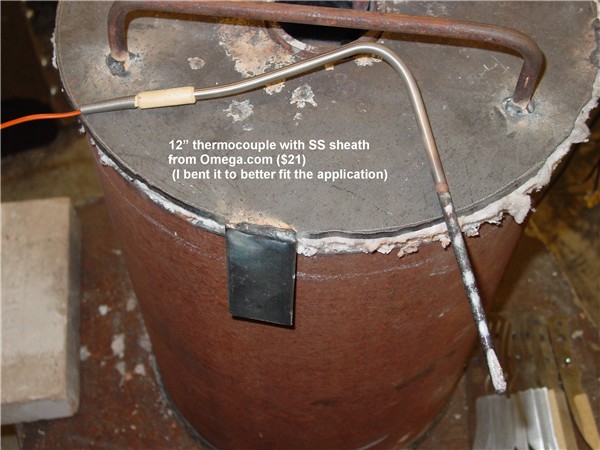
You'll also need a Type-K thermocouple. I ordered mine from Omega.com At the bottom of the Omega.com page, there is a "part number builder"...input the following into each of the drop down boxes....
You'll also need a Type-K thermocouple. I ordered mine from Omega.com At the bottom of the Omega.com page, there is a "part number builder"...input the following into each of the drop down boxes....
1. K (type K thermocouple)
2. SS (stainless Sheath)
3. 14 (1/4" Diameter)
4. U (Ungrounded)
5. 12 (12" long)
This should get you the proper thermocouple
The "Forge" portion
I'm not going to get too in-depth on this part...if you're building a Salt Tank, chances are good that you already know how to build a propane forge. This is nothing more then a propane forge, set up on it's end, with a lid that has a hole for the size tank you intend to use, and a "stack" to direct the hot exhaust away from you. The burner is nothing more then a simple venturi that I built from a 12" piece of 1" diameter black iron pipe, a bell reduced. And some 1/4" brass pipe and fittings for the gas nozzle.
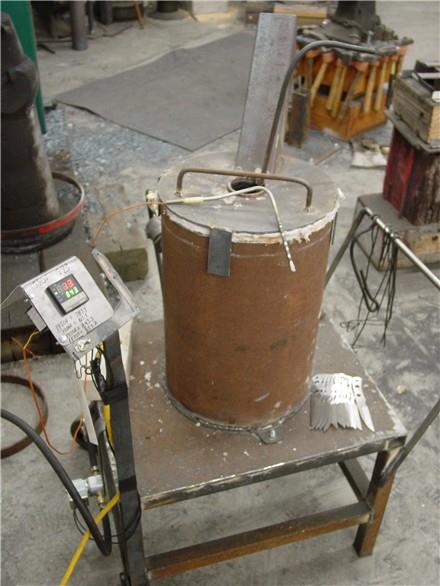
The outer shell is 12" diameter X .187" wall pipe, 20" long. I built the cart in the picture specifically to hold the forge/salt tanks. The interior is lined with 1" thick X #8 density Ka-wool, as is the bottom and the top. I used a 1/4" thick piece of plate for the lid....a piece of 3" square tubing for the "stack", and cut a centered 2 3/4" hole in the lid for the top of the salt tank. (my salt tank/container is 316SS, 3/8" wall X 2"ID X 19" long. With a 6" square of 3/8" thick 316SS welded on the bottom ).
The key to building a Salt Tank that maintains temp accuracy is keep the thermal mass as small as possible (the mass of molten salts and the tank/container) while still meeting your personal needs. More thermal mass causes wider and wider temp fluctuations....keep your tank and the amount of salts used as small as possible to fit your needs.
I almost never build a blade wider then 2", so I kept the salt container diameter there.
Below are a couple of view of the Venturi burner I built specifically for my Salt Tank setup.
Below are a couple of view of the Venturi burner I built specifically for my Salt Tank setup.
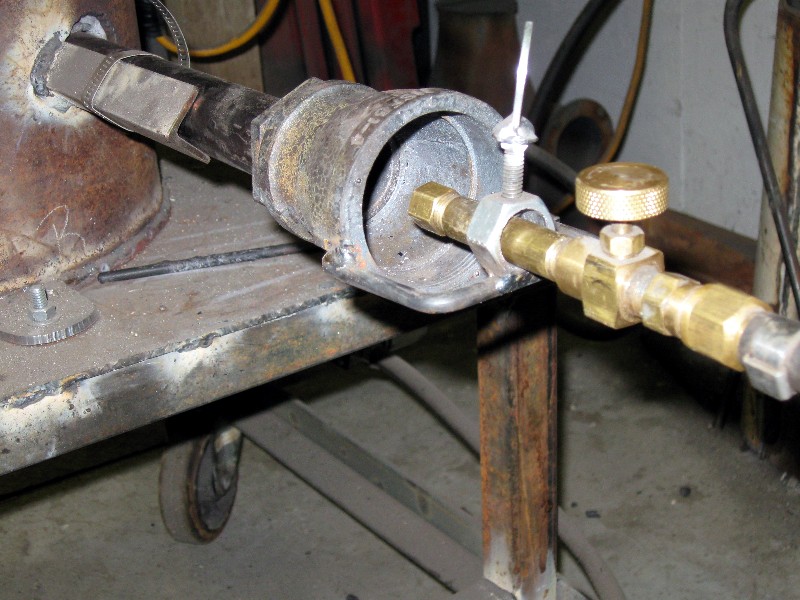

Positioning of the burner into the "forge" body is critical. The burner should be near the bottom of the "forge", place at a tangent to produce a swirling flame. The critical part of this is that you want the solid mass of salt in the tank to melt as evenly as possible. These "salts" melt at 900F, and have a working range to 2000F.
The safety issue is that as the salts melt, they expand greatly. If you're in a hurry, and run the burner too hot, the bottom of the salts will melt, expanding as they do, and essentially create a mortar with the "mortar shell" being the mass of solid salts near the top of the tank! There are two keys to prevent this.... 1. Once you get the burner fired, KEEP IT LOW AND SLOW (it generally takes about 30-45mins for the salts in my tank to turn to a liquid). 2. After every use, while the salts are still in their liquid state, insert a 1/2-3/4" steel rod into the tank and leave it there. This rod will act as a heat conductor, and melt the salts surrounding it to release any pressure built up by the expansion the next time you fire it up.
Wiring the controller and gas valve
Next is how I wired the controller and gas valve. The funny thing about these PIDs is that the switch, which turns on power to the gas valve, isn't on an internal poer curcuit. Therefore you must run a jumper wire from one leg of the power, to terminal #5 in order for the controller to engage/disengage the gas valve. Following is a text version of how I wired the PID.
-Terminal #1: Power source ground wire (green wire)
-Terminal #2: Line 1 Power source (black wire)
-Termianl #3: Line 2 power source (white wire)
-Jumper wire from termianl #2 to terminal #5
-Terminal #3: One leg of gas valve
-Terminal #4: Second leg of gas valve
-Terminals #6, #7, & #8: NOT USED
-Terminal #9: Negative wire of thermocouple (red wire)
-Terminal #10: Positive wire of thermocouple (white wire)
-Terminal #2: you can wire an on/off toggle switch here if desired, otherwise you'll have to plug/unplug the power cord for your on/off
Hopefully this information will give you what you need in order to build and wire a High Temp Salt Tank. I've tried to give the basic information here, but if you have questions, feel free to contact me!


High Temp Salt Tanks


"Nobody Cares What you Know...
Until They Know You Care!"
Until They Know You Care!"
Copyright 2024/25: "The Montana Bladesmith"
406-727-9102